

Shared hosting service refers to a web hosting service where many websites or application resides on the same server. If you choose a shared hosting plan, then your website will share a physical server with other websites. Installing a Django web framework app on shared hosting can be hard and tricky because many hosting platforms come with jailed shell access and limited software installed such as python. This post will teach you how to install Django on a shared hosting instance. First, what is Django web framework:
Django web framework
Django is a python based web framework used to develop full-stack web applications. Nowadays, many people are using Django as an API development platform. The problem with Django is that you’ll never find a cheap hosting platform to host your app where you’re not limited in any way to what you can do with it. Zimhero web hosting services come with python and shell access enabled which allows you to do everything you want and also use the PostgreSQL database instead of MYSQL.
Let’s now dive into how you can make your website with python on zimhero shared hosting plan.
1. Create a python app
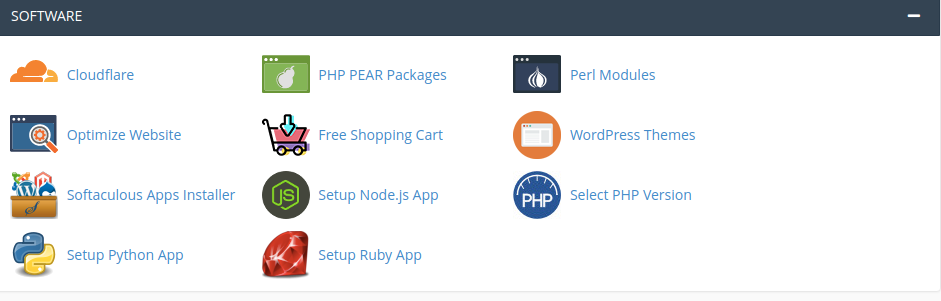
Log into your cPanel and create a python application. Django depends on python and so you need to install it before you can create anything. Login to your cPanel and go under software and click the create setup python app. You’ll be prompted to create select your application name, the directory where you want the application to reside, and the domain name or subdomain. You also have to select the python version that you want to use with your application. Use Python version 3.7 which is the current version.
2. Create a PostgreSQL database
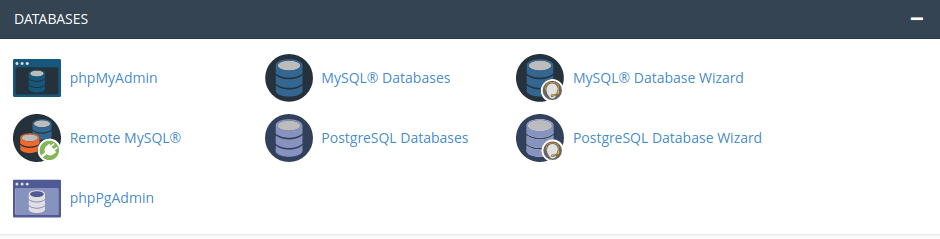
After creating your application, you need to create a database, in our case a PostgreSQL database. The choice of the database is purely objective or personal and you can also choose the MYSQL database but it comes with its own configuration drawbacks.
4. Create the Django application on your local machine
After everything is all set on your cPanel, create a localhost Django application. Use the default database for now. The application must be installed in a virtual environment. Let’s start:
mkdir website
cd website
pipenv install django==3.0.4 psycopg2-binary==2.8.4
pipenv shell
If you get a django python version error, run the following command and rerun the above command.
pipenv --rm
Now you have installed your django on a virtual environment. After installing django, you need to create the actual django application. I assume you’re already in the pipenv virtual environment.
django-admin startproject myproject .
python manage.py runserver
You’ll get a nice Django welcome page on your localhost. Now let’s add a special script that enables your application to run on shared hosting. Create file passenger_wsgi.py in your project root folder, the dame folder with manage.py.
5. Passenger WSGI file
touch passenger_wsgi.py
Add the following code into your passenger_wsgi.py file.
import <website name>.wsgi
SCRIPT_NAME = '/home/<cpanel username>/mywebsite'

class PassengerPathInfoFix(object):
    """
    Sets PATH_INFO from REQUEST_URI because Passenger doesn't provide it.
    """
    def __init__(self, app):
        self.app = app

    def __call__(self, environ, start_response):
        from urllib.parse import unquote
        environ['SCRIPT_NAME'] = SCRIPT_NAME

        request_uri = unquote(environ['REQUEST_URI'])
        script_name = unquote(environ.get('SCRIPT_NAME', ''))
        offset = request_uri.startswith(script_name) and len(environ['SCRIPT_NAME']) or 0
        environ['PATH_INFO'] = request_uri[offset:].split('?', 1)[0]
        return self.app(environ, start_response)

application = <wesite name>.wsgi.application
application = PassengerPathInfoFix(application)
6. cPanel database
You’re almost done with your Django application setup. After the above process, now change the default Django application database in your settings.py file. Put the database and user details you created in your cPanel
DATABASES = {
    'default': {
        'ENGINE': 'django.db.backends.postgresql',
        'NAME': '<database name>',
        'USER': '<database username>',
        'PASSWORD': '<database user password>',
        'HOST': 'localhost',
        'PORT': 5432
    }
}
7. Initialise git
We’re going to use git and github to manage our development. Inside your project root folder initialize your git repository. Ass your remote GitHub directory you have created. Add and commit all the files. Don’t forget to push that code to GitHub.
